Tag: food

  • Sticky Ginger Cake Recipe

    Sticky Ginger Cake Recipe

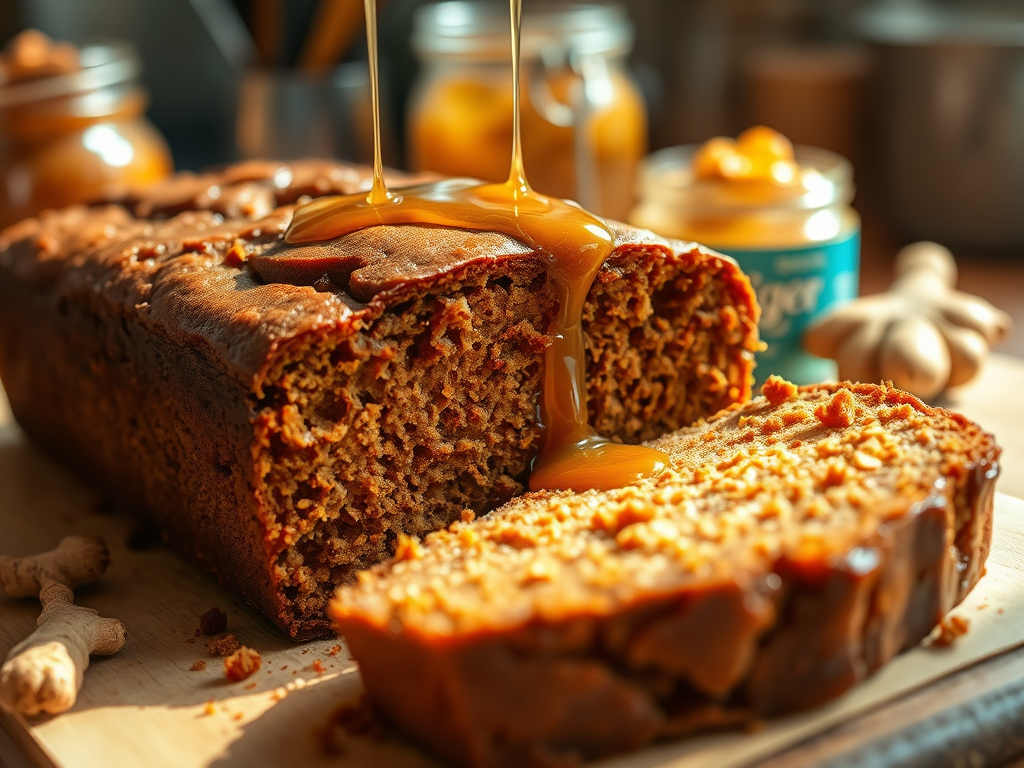
    If you like the classic McVities Jamaica Ginger Cake but want something a bit more substantial and homemade then my mum’s ginger cake recipe is going to be a winner. It’s a nice simple cake to make and lasts really well if you can avoid eating it straight away

    Ingredients

    • 200g butter
    • 175g molasses sugar
    • 3 tablespoon black treacle
    • 150ml milk
    • 2 large eggs
    • 300g self-raising flour
    • 1 tbsp ground ginger
    • 1 teaspoon mixed spice
    • 1/2 teaspoon cinammon
    • Jar of chopped ginger in syrup (Sainsbury’s sell this)
    • Jar of ginger jam
    • 1 teaspoon baking powder

    Method

    • Preheat oven to 160 degrees (140 fan) or gas mark 3
    • Grease and line tin(s) – can use 9″ round or square tin or will make a couple of loaf tins
    • Melt butter, sugar, and treacle together over a pan of water
    • Beat milk & eggs together
    • Let the melted mix cool a bit then mix in the milk & egg mixture
    • Add all the other ingredients and mix well (ginger, flour, spices)
    • Pour mix into tin(s) and bake for 30-35 minutes

    Can add a lemon water icing to the top once cooled or can stab with a skewer and add some more ginger syrup.

    Tastes better if you leave it for a couple of days wrapped up – it’ll get stickier and taste better. Really good to warm up a slice and serve with cream.

  • Easy Scone Recipe

    This is my mum’s failsafe scone recipe – works perfectly for creating plain, fruit, or cheese scones. The basic recipe makes 12 scones

    Ingredients

    • 450g self-raising flour
    • Good pinch of salt (preferably seasalt)
    • 110g butter (chilled and cut into small cubes)
    • 50g golden caster sugar
    • 300ml milk (and a little extra for a glaze)

    Process

    1. Preheat your oven to 220C/425F or Gas mark 7
    2. Lightly grease a flat baking sheet (or line with baking parchment)
    3. Sift flour & salt into a large bowl
    4. Add the butter, rubbing it into the flour with your fingertips. If you lift your hands whilst doing this you’ll get more air into the mixture to help it rise. The ingredients are combined when the mix looks like fine breadcrumbs
    5. Stir the sugar into the mix
    6. Add enough milk to make a soft dough (not too sticky) drawing the mixture together using a palette knife rather than your hands
    7. Flour your worksurface and also dust your hands with flour and then turn the dough onto it. Knead it lightly and then wrap in clingfilm and chill in the fridge for at least 15 minutes
    8. Get the dough out of the fridge and flatten with your hand (no need to roll) on a floured surface until the dough is about 1.5 inch thick (you can make them thinner – about an inch – but I like scones that are taller than they are round!)
    9. Cut out scones with a 2 inch (5cm) cutter – don’t twist as you press cutter down as this makes them rise unevenly
    10. Re-roll the trimmings and cut out the remaining scones
    11. Arrange on the prepared baking tray and lightly brush with a little milk
    12. Bake in the preheated oven for 12-15 minutes. They’re ready when they’re well risen, the top is golden and the bottom sounds hollow when tapped
    13. Cool on the tray for a couple of minutes and then transfer to a wire rack

    They’re great eaten still warm with butter and jam, adding clotted cream for a treat. They’re still OK the next day – but better if warmed for a couple of minutes

    Variations

    You can vary the plain scone mix – here’s a couple of options:

    • Add 50g of dried fruit to the mix before adding the milk. Raisins are good as they’re smaller and don’t cause the scone to crumble when cut
    • Leave out the sugar and add 75g of grated cheese (mature cheddar or Red Leicester work well). Add in a touch of mustard powder or cayenne pepper too for some extra flavour. You can also sprinkle a little cheese on top before cooking. Cheese scones are very nice toasted the next day